
In this post I will focus on the steps I took to make my first post publicly available as opposed to spending time on how to customise your blog.
I would highly recommend Jeff Ammons Pluralsight course on Build a Better Blog with a Static Site Generator for Hexo customisation.
Topics
- Register a Domain
- Register a AWS account to host your blog
- Create AWS S3 (Simple Storage Service) bucket
- Install Hexo
- Publish to AWS S3 bucket via AWS CLI tool
- Create CloudFlare Account for Secure Browsing and more
- Resources
Register a Domain
First thing I did was to register a personal domain name - ruanbeukes.net.
Easiest is to google ‘domain registrars’ for heaps of choices.
Choose the very first one in the list and start exploring with domain names.
Once you have identified your available domain name, you are ready to explore other registrars to compare prices.
When the price suits, and you have read a few online reviews about your new registrar, sign up to purchase your domain name.
I pay AUD$11.50 annually.
* Add Privacy Protection and protect yourself from spam and scams when purchasing your domain. *
Think of your domain name as an entry in the yellow pages where someone can lookup your phone number.
I do not want my personal details publicly available.
You can make it private by adding Privacy Protection.
I pay AUD$7 annually.
If you have concerns about your personal details, use whois and enter your domain name.
Register a AWS account to host your blog
Go to Amazon Web Services (AWS) and create a free account.
You will need a credit card to register.
Fill out your credentials and sign up for a Personal Account.
Amazon bills you when you exceed their free usage deal.
It works on a ‘Pay-As-You-Use’ model and is really cheap.
They have plenty of services to choose from but I use their S3 feature for my blog.
Create AWS S3 (Simple Storage Service) bucket
Amazon S3 gives you secure, durable and highly-scalable cloud storage.
Login to your AWS account and find the S3 service under the Services menu.

Hit the Create Bucket button and it will prompt you with a Bucket Name and Region.
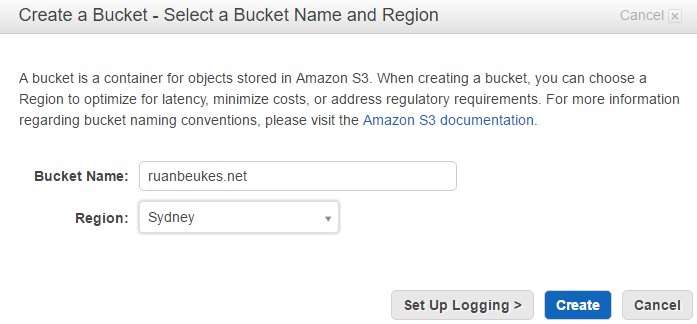
* Bucket Name must be your domain name. *
The Region should be the one closest to your location.
Create your bucket!
** Permissions: **
Go to the Properties of the bucket and expand Permissions, click on the Edit bucket policy.
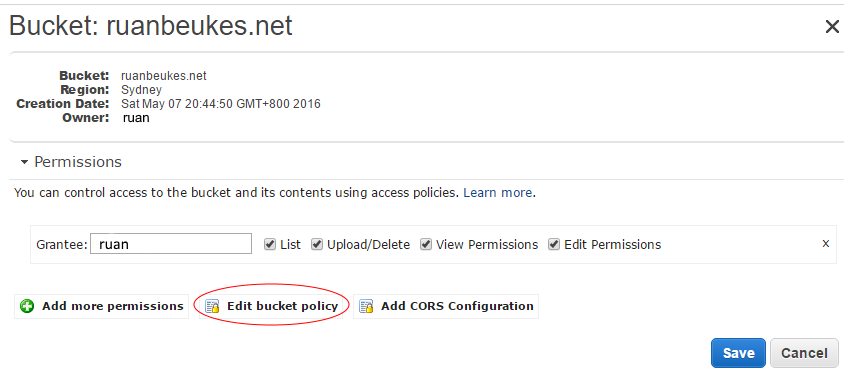
Add this code I found in the AWS docs
1 | { |
** Static Website Hosting: **
Go to the Properties of the bucket and expand Static Website Hosting, enable website hosting.
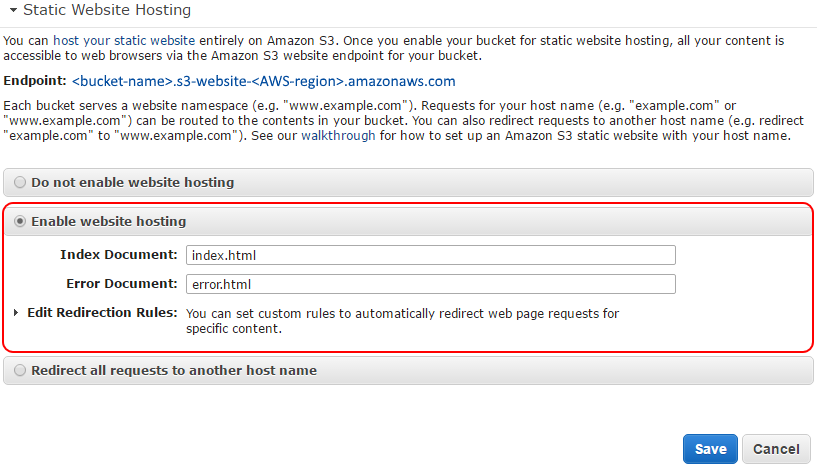
Add Index Document - index.html.
Optional to add Error Document - error.html.
The Endpoint is the link you should use if you don’t have a domain name registered.
Note - The bucket endpoint is also used by CloudFlare later in this post.
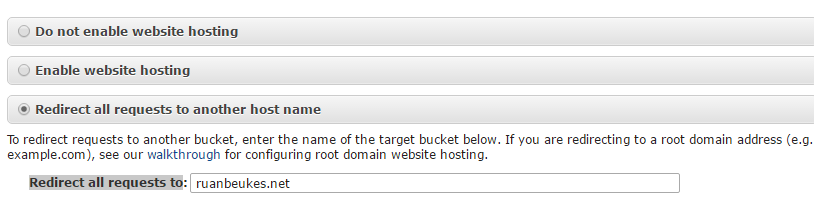
** Create ‘www’ sub domain bucket and redirect to domain **
I also created a www.ruanbeukes.net bucket which points to ruanbeukes.net.
Create the www.{YourDomainName} bucket and go to its Properties and expand the Static Website Hosting. Select the ‘Redirect all requests to another host name’ option.
Fill out the ‘Redirect all requests to’ text box with the domain bucket name.
The AWS help documentation is very good. There is always a ‘Learn more’ link on the option I explored which explained in detail what the setting or section is all about.
Resource - Hosting a Static Website on Amazon S3
Install Hexo
Hexo is a static blog engine. It is a fast, simple and powerful.
Setup is easy with the Hexo Docs. Prerequisites are Node.js and Git.
Then it’s as easy as
1 | $ npm install -g hexo-cli |
You can make sure Hexo installed correctly by opening command prompt and run ‘hexo’.
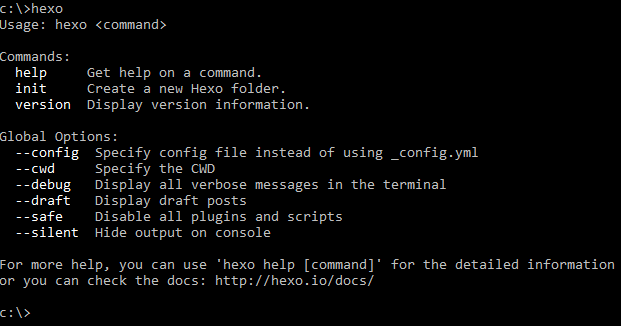
Once installed, create a folder and initialise Hexo in that folder. By default you will get the Landscape theme.
1 | $ hexo init |
Install hexo dependencies.
1 | $ npm install |
Run the hexo server to browse your blog on http://localhost:4000/.
1 | $ hexo server |
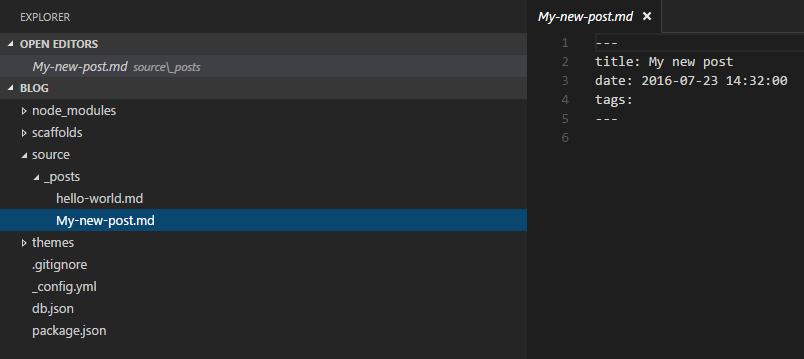
Create a new post
Very easy to create a new post
1 | $ hexo "Hello World" |
Hexo creates a Mark Down file with a Title, Date and Tags. Now your file is ready for your content.
Check out the Hexo documentation on how to use and change the header settings.
When you’ve create your ‘Hello World’ post and you are ready to deploy to the server, I run the ‘Generate’ command.
1 | $ hexo generate |
It creates the output in the Public folder eg:
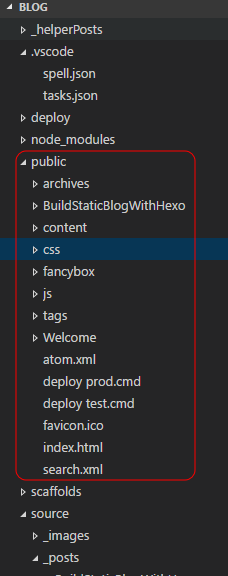
Run the hexo server and test your blog.
There are many more commands you can use. I only covered the ones I use regularly.
Publish to AWS S3 bucket via AWS CLI tool
Easiest way to publish files to your S3 bucket is to login to AWS, go to S3 services, use the web UI ‘Actions’ button and select ‘Upload’.
After a while it becomes a tedious repetitive job, so I researched their CLI tools - AWS CodeCommit Command Line Reference.
First download and install AWS CLI tool - Install instructions on AWS CLI tool.
When successfully installed, configure security keys.
** Configure Security Keys for CLI tool **
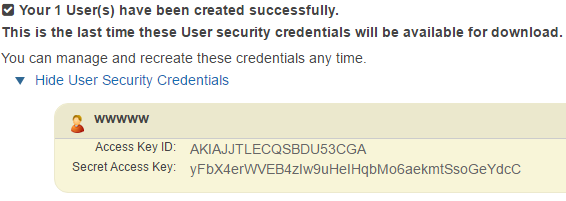
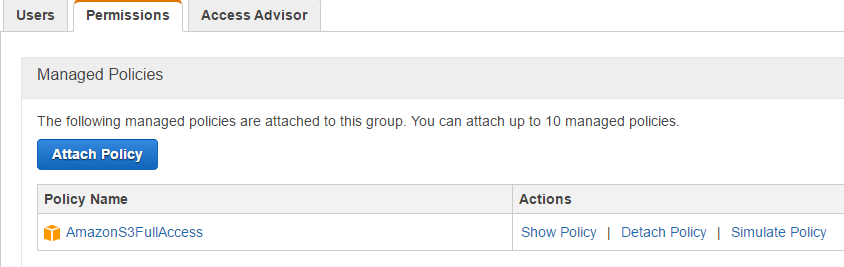
Go to AWS IAM (Identity and Access Management) manage console. This is where you create users and groups.
I’ve created a new user. The new user has a Access Key ID and a Security Access Key.
Keep the Secret Access Key safe as it is used for authentication to S3 buckets.
I also created a group with a Permission Policy of AmazonS3FullAccess and added the user to that group.
Then, open a command prompt and run to configure CLI security
1 | aws configure |
AWS Access Key ID [None]: Type your target AWS access key ID here, and then press Enter
AWS Secret Access Key [None]: Type your target AWS secret access key here, and then press Enter
Default region name [None]: Type us-east-1 or any other region here, and then press Enter
Default output format [None]: Type json here, and then press Enter
You can test your config with ‘ls’ command. This should list all your buckets on S3.
1 | aws s3 ls |
Resource - Configure the AWS CLI
** Create batch file to run CLI with ‘sync’ command **
I use the ‘sync’ command to copy and update my content.
This is what I execute in the batch file
1 | aws s3 sync . s3://ruanbeukes.net --delete --exclude ".vscode/*" --exclude ".git/*" --exclude "*.bat" |
AWS CLI is now configured.
Resource - CLI Commands.
Create CloudFlare Account for Secure Browsing and more
I use CloudFlare for these reasons:
1. Map my domain name to my S3 bucket endpoints
2. Secure browsing
3. It free! :)
The outcome of the CloudFlare setup: https://ruanbeukes.net instead of http://ruanbeukes.net.
Create a CloudFlare account.
** Map S3 bucket endpoints **
Look for the Add Site menu option and add your domain name and let CloudFlare do its magic.

Add your S3 endpoints. Here is my setup…
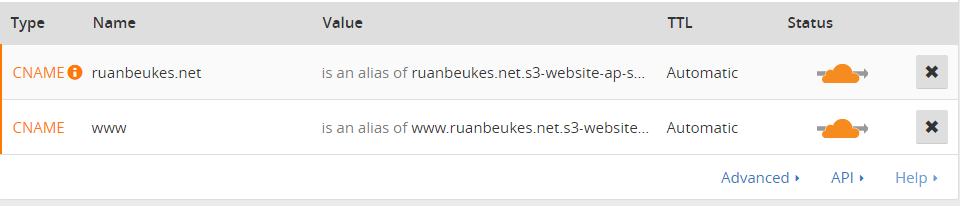
CNAME with my domain name S3 bucket endpoint.
CNAME with my sub domain S3 bucket endpoint.
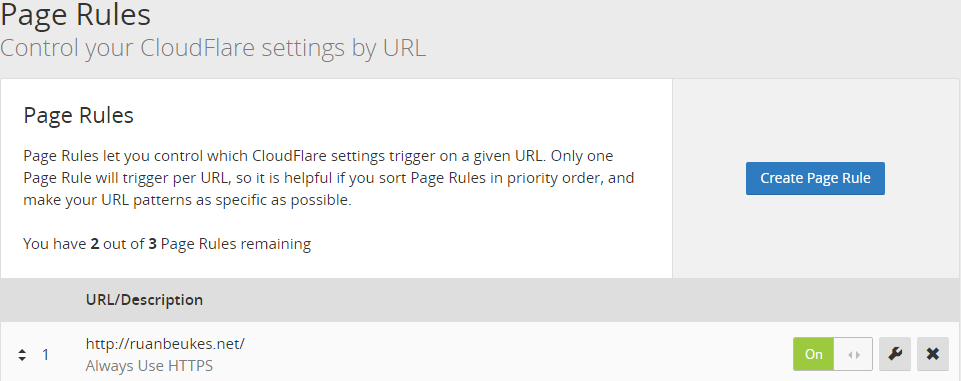
** Secure browsing **
Next, go to the Crypto menu section and make sure your SSL is set to Flexible.
Then, create a Page Rule to force HTTPS only.
The last bit is to update your domain registrar Nameservers with the two assigned to you from CloudFlare.
One thing you need to understand about these changes - BE PATIENT! I was chasing ghost a few times because of my impatience. CloudFlare suggests up to 24hrs for settings to take effect.
In my case it was 2-3 hours. But still, I could have gone to bed earlier :)
So…when you’ve waited patiently, test your domain URL the next day or you can use WhoIsHostingThis to make sure hosting is done by CloudFlare.
CloudFlare has a CDN (Content delivery network) feature and will request my blog content from the S3 bucket.
This is the reason why the host is CloudFlare instead of Amazon.
Resource - How do I use CloudFlare with Amazon’s S3 Service?.
Done
In my next post I’ll cover adding comments to your Hexo blog.
Resources
AWS Docs
- Specifying Permissions in a Policy
- Hosting a Static Website on Amazon S3
- Setting Up a Static Website Using a Custom Domain (Route 53)
- AWS CodeCommit Command Line Reference.
- Configure the AWS CLI
- CLI Commands
Hexo Docs
CloudFlare
Pluralsight
I would highly recommend Jeff Ammons Pluralsight course on Build a Better Blog with a Static Site Generator.
It is a goodie for Hexo customisation and other gold nuggets.
Thanks Jeff, keep up the good work!